Step 3. Add AWS services account
In AWS, we need two accounts:
- Service account for any shared resources amongst all MACH stacks
- Site-specific account for resources specific to a single MACH stack
In this step we'll create the first one, the service account.
Tenancy model
As described in the tenancy model, we advise to set up your MACH environment by creating one service AWS account containing shared resources and create an AWS account per stack.
This way, all resources are strictly separated from eachother.
Setup service account
For this account we will create a
- Terraform state backend to store the infrastructure state
- Artifact repository to deploy all MACH components to
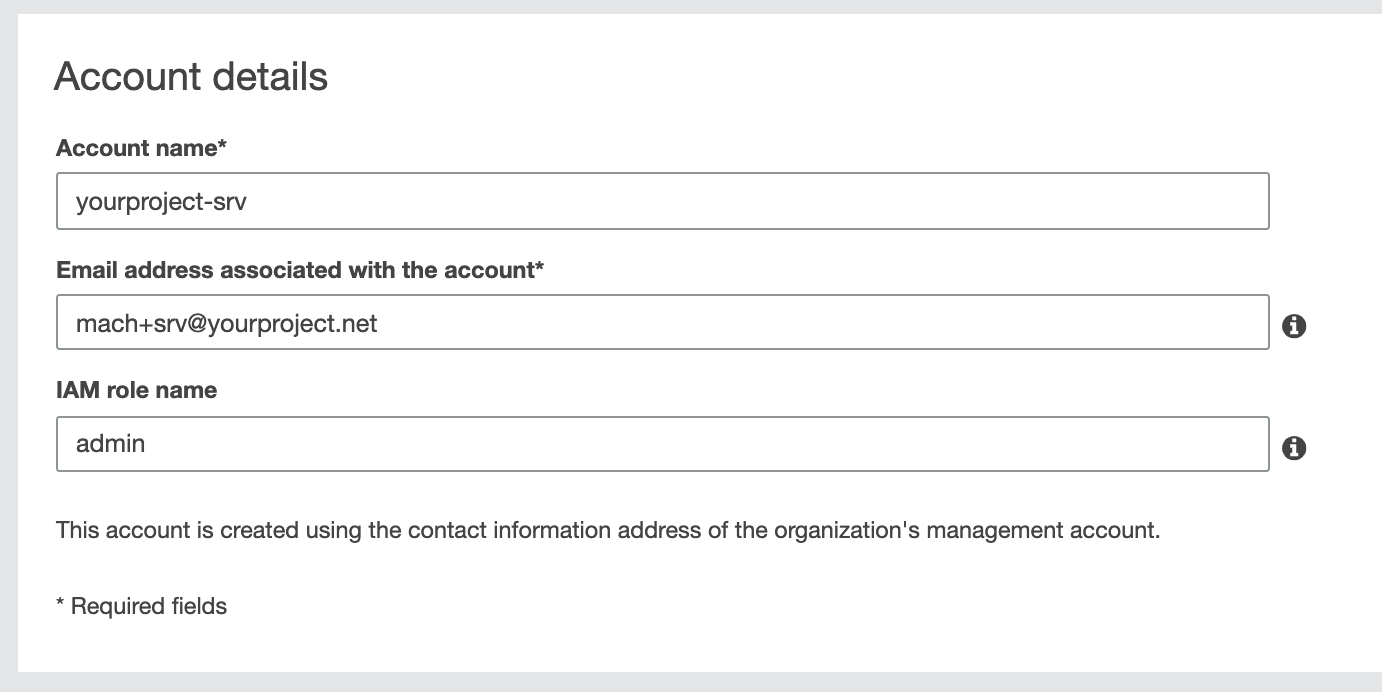
1. Create AWS account
- In your AWS console, go to My Organization and choose Add accounts
- For your new account choose a name like
your-project-srvoryour-project-shared - As IAM role name enter
admin1
No root AWS account yet?
Go to AWS support for instructions on how to set up your AWS root account.
2. Setup your Terraform configuration
Create a directory / Git repository with two subdirectories:
servicemach-account
Directory structure
We will use mach-account later when setting up our AWS site account.
For now, we'll work in the service directory
variables.tf
variable "aws_account_id" {
  default = "<your-account-id>"
}

variable "name" {
  default = "your-project" # Replace with the actual project name
}

variable "region" {
  default = "eu-central-1"
}
main.tf
locals {
  role_arn = "arn:aws:iam::${var.aws_account_id}:role/admin"
}

provider "aws" {
  region  = var.region

  assume_role {
    role_arn = local.role_arn
  }
}
modules.tf
module "tfstate-backend" {
  source                             = "cloudposse/tfstate-backend/aws"
  version                            = "0.33.0"
  s3_bucket_name                     = "${var.name}-srv-tfstate"
  role_arn                           = local.role_arn

  terraform_backend_config_file_path = "."
  terraform_backend_config_file_name = "backend.tf"
}

module "shared-config" {
  source            = "git::https://github.com/labd/terraform-aws-mach-shared.git"
  code_repo_name    = "${var.name}-lambdas"
  aws_account_alias = "${var.name}-srv"
  allow_assume_deploy_role = [
    "arn:aws:iam::000000000000:user/admin" # Specify your root account here
  ]
}
allow_assume_deploy_role
We specify our root account here, so it makes it easier for this tutorial to set up credentials to be able to deploy the components.
3. Terraform apply
- Within your
servicedirectory, run the following commands:$ terraform init $ terraform apply - Terraform has now created a
backend.tffile which instructs Terraform to store the state on a S3 bucket.
In order to move the current (local) state file to the bucket, perform this one-time command:Now the state is stored in the S3 bucket, and the DynamoDB table will be used to lock the state to prevent concurrent modification.$ terraform init -force-copy
Next: step 4
Next we'll set up the AWS account for a MACH stack.
-
For the sake of simplicity we will use the default administrator role that AWS will create for us.
However, as best practise, we advise to create an admin (or sudo) role explicitly with Terraform. ↩